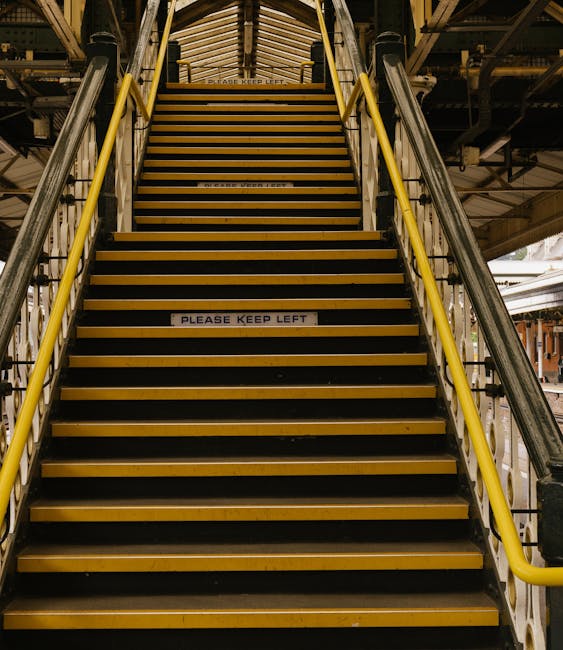
Team Lifting Techniques for Narrow Victorian Staircases

Narrow Victorian staircases can turn a simple move into a careful bit of choreography. One wrong turn, one awkward angle, and suddenly a wardrobe feels twice its size. That is where team lifting techniques for narrow Victorian staircases really matter. Whether you are shifting a sofa, a heavy chest of drawers, or a full bed frame, the right method keeps the item, the walls, and everyone carrying it in better shape.
Truth be told, these staircases were built for a different era. Tight turns, shallow landings, creaky treads, and low ceilings can make modern furniture feel like it was designed by someone with no respect for door frames. This guide walks through how team lifting works, when it makes sense, what to avoid, and how to prepare properly so the job feels controlled rather than chaotic.
It is written for anyone planning a move in an older London property, especially if the stairs are narrow, the route is awkward, and the item is heavier than your confidence levels. Let's make it practical.
Why Team Lifting Techniques for Narrow Victorian Staircases Matters
Older homes have character. They also have stairs that seem to have been built with a measuring tape and a sense of mischief. A Victorian staircase is often steep, curved, and narrow enough that two people can barely pass each other, let alone carry a bulky item. On paper, it sounds like a simple lifting problem. In real life, it is a balance, communication, and route-planning problem.
Team lifting matters because the risks are not limited to the item itself. You are also protecting:
- the people lifting, especially backs, shoulders, hands, and fingers
- the property, including plaster, banisters, spindles, and painted walls
- the item, which can be chipped, twisted, or scratched on tight corners
- the neighbours below if something slips or drops
In our experience, the hardest part is often not the weight but the geometry. A sofa may be light enough for two strong people on flat ground, yet it becomes awkward the moment the stairs turn. That awkwardness is where mistakes happen. And let's face it, nobody wants to discover mid-lift that the wardrobe was measured with optimism rather than a tape measure.
Team lifting techniques give structure to a job that can quickly become improvised. They create a shared plan: who leads, who supports, where to pause, how to pivot, and when to stop before the corner becomes a problem. That planning is especially useful in period properties in areas like Kensington, Islington, Camden, Battersea, or Chelsea, where narrow access and older stair layouts are common.
How Team Lifting Techniques for Narrow Victorian Staircases Works
At its simplest, team lifting is a coordinated carry by two or more people who move as one unit. On a narrow staircase, the team usually does not try to muscle through in a straight line. Instead, the lift is broken into controlled stages: assess, position, lift, climb, rotate, pause, and set down.
The method changes depending on the item, but the basic principles stay the same:
- One person leads the route. This person watches the staircase, calls the pace, and gives instructions.
- Everyone agrees on commands. Simple words like "lift," "pause," "pivot," and "down" help avoid confusion.
- The item stays balanced. The load should be kept as level as possible unless the staircase requires a tilt for clearance.
- Movement is slow and deliberate. Rushing on a tight staircase is where scrapes and slips happen.
- Micro-pauses are normal. A short pause on a landing or halfway up is not a failure. It is part of control.
A narrow Victorian staircase often forces a slight tilt or end-over-end movement, especially for long items such as wardrobes, mattresses, or desks. Sometimes the item has to be carried upright for part of the route. Sometimes it needs to be threaded around a corner at a careful angle. This is why two people who are used to lifting on a flat floor can still struggle in a stairwell. The stairs change the whole job.
One small but important point: the best team lifts are quiet. Not silent, exactly, but calm. You should hear steady communication, not panicked shouting and furniture scraping the wall like a shopping trolley in a wind tunnel.
Key Benefits and Practical Advantages
Done well, team lifting techniques give you more than just a way to move heavy things upstairs. They reduce friction in the whole process, and that has real practical value.
1. Better control in tight spaces
Control is everything on narrow staircases. Two or three people can share the load, adjust on the fly, and correct the angle before it turns into a problem. That matters far more on a Victorian staircase with tight corners than on a modern straight run.
2. Lower risk of damage
Walls in period homes can be fragile. Banisters may be old. Paint can mark easily. Team lifting allows small corrections that help protect both the furniture and the building fabric.
3. Less strain on one person
Carrying an awkward item by yourself on stairs is where people overreach, twist, or lose balance. A proper team lift spreads the effort so nobody is bearing the full burden.
4. Faster problem-solving
If the item needs to rotate, lift higher at one end, or be shifted around the corner, a team can respond immediately. One person can keep eyes on the wall clearance while another handles the weight. That saves time, oddly enough, even though the lift itself is slower and more deliberate.
5. Safer decision-making
When more than one person is involved, there is usually a built-in moment to stop and reassess. That pause is useful. If the staircase is simply too tight, the team can spot it before anyone gets stuck halfway up with a sofa wedged at shoulder height. Not ideal, to be fair.
| Approach | Best for | Pros | Limitations |
|---|---|---|---|
| Solo lifting | Very light, compact items | Simple, quick for small loads | Higher strain, poor control on narrow stairs |
| Two-person team lift | Most household furniture | Better balance, easier communication | Still challenging for bulky or oversized items |
| Three-person coordinated lift | Very awkward or heavy items | Extra control and spotting | Needs clear leadership and more space |
| Specialist move plan with equipment | Oversized, fragile, or difficult access | Best for difficult staircases and heavy items | May need more preparation and cost |
Who This Is For and When It Makes Sense
Team lifting is not just for removal crews. It makes sense for homeowners, tenants, landlords, and businesses dealing with bulky items in older properties. If your staircase is narrow, steep, or curved, there is a good chance you will benefit from a planned team lift rather than a last-minute heave.
This approach is especially useful when moving:
- sofas and armchairs
- wardrobes and tall cabinets
- beds, divan bases, and headboards
- dining tables and large desks
- washing machines or other heavy appliances
- pianos or other very awkward items, where specialist handling may be needed
It also makes sense when the property itself adds pressure. Maybe there is a narrow hallway, a sharp turn at the bottom of the stairs, or a landing that barely gives you room to breathe. Maybe the item has to be moved while other people are still in the property. Maybe the walls are freshly painted and you really, really do not want a black scuff line on them. All fair reasons.
Commercial moves can also bring the same issue. Small offices in converted Victorian buildings, studios above shops, and mixed-use buildings often have the same awkward stair constraints. In those cases, team lifting is part of a wider moving plan, not just a one-off lift.
If you are unsure whether to do it yourself, ask a simple question: can the item be turned safely without forcing anyone into an unstable position? If the answer is no, that is your sign to slow down and plan more carefully.
Step-by-Step Guidance
Here is a practical way to approach team lifting on a narrow Victorian staircase. This is not about showing off strength. It is about method.
Step 1: Measure the item and the route
Before moving anything, measure the item's width, height, and depth, then compare it to the staircase, landings, and door openings. Pay attention to handrails, light fittings, and low ceilings. A tape measure is boring. It is also your best friend here.
Step 2: Clear the route completely
Remove rugs, shoes, baskets, and anything else that could catch a foot. Open doors fully if possible. Protect corners and bannisters if there is a risk of contact. A few minutes of clearing can save a lot of hassle.
Step 3: Decide the leader and the commands
Choose one person to lead the lift. That person should give short commands only. Everyone should know the same words before the move begins. "Stop" should always mean stop. No guessing.
Step 4: Test the item's balance point
For bulky furniture, work out where the natural balance point is. If one side is much heavier, note it. The person on the heavier end may need to take the lead on certain sections, especially around corners.
Step 5: Lift in sync
Raise the item together on the agreed command. Keep wrists neutral where you can, bend at the knees, and avoid twisting while bearing weight. If the item is too awkward to lift cleanly, set it down and reset. There is no prize for pushing through bad positioning.
Step 6: Move slowly up the stairs
Take small steps. Watch for tread depth changes, turning points, and head height. On many Victorian staircases, one person may need to go slightly above or below the other depending on the shape of the item. That is normal.
Step 7: Use the landing as a reset point
If there is a landing, use it as a controlled pause. Reposition hands, check the angle, and agree the next move. This is often the moment where people think, "Right, now we see the problem," which is much better than seeing it three steps later.
Step 8: Rotate carefully around corners
Corner turns are usually the hardest part. Keep the item moving in a single calm motion if possible. If you need to rotate, do it slowly and with clear instruction. One person may need to guide the top end while another manages the lower end around the bannister.
Step 9: Set down safely
When you reach the destination, lower the item together and do not rush the final placement. Many accidents happen at the end when people relax too early. Finish the lift properly, then step back and check for marks or pressure points.
Step 10: Reassess before the next item
If there are more items, do not assume the same method will work every time. Different furniture needs different handling. A mattress is not a wardrobe. A wardrobe is not a chest of drawers. Obvious, yes, but easy to forget once the moving energy kicks in.
Expert Tips for Better Results
The best team lifts tend to look almost uneventful from the outside. That is usually a sign they were planned well.
- Use gloves with grip. They help with control and reduce the chance of slipping on smooth wood, varnished handles, or taped-up items.
- Protect fragile surfaces before the move starts. It is easier to prevent damage than to apologise to a chipped wall later.
- Keep voice commands short. Long explanations mid-lift create confusion. Short commands work better.
- Walk the route first. A quick dry run, without the item, often reveals where the tight points are.
- Lift with the legs, not the back. This is common advice for a reason. It still gets ignored, unfortunately.
- Accept when the item needs a different angle. Forcing it straight up a staircase is often the wrong approach.
- Pause early if anything feels unstable. A quick reset is better than trying to recover from a wobble halfway up.
One useful habit is to narrate the move as you go. Not theatrically, just plainly: "Up two steps," "Pause," "Turn left," "Mind the rail." It keeps everyone aligned. A bit like a dance, minus the music and glamour.
If the item is especially valuable or fragile, add extra hands or use padding at contact points. Older staircases can have rough edges, and even a tiny knock can leave a visible mark. You do not want your antique sideboard introduced to Victorian plaster in the wrong way.
Common Mistakes to Avoid
Most moving problems on narrow staircases come from a small number of repeated mistakes. The good news is that they are avoidable.
1. Skipping the measuring stage
People often assume "it will fit if we try." That is rarely a plan. Measure the item and the staircase first, especially if there is a turn or low ceiling.
2. Using vague communication
"Ready?" "Yeah." "Okay." That is not enough. Agree on specific commands before lifting. Otherwise one person might move while another is still adjusting grip.
3. Carrying too fast
Speed reduces control. On a narrow Victorian staircase, control is worth more than momentum.
4. Ignoring the landing
Landings are not just a place to catch your breath. They are useful for changing angle, rechecking grip, and preventing awkward twists.
5. Forcing a straight-line carry
Sometimes the safest route is a diagonal or vertical tilt. Trying to keep the item flat because it feels neater can backfire.
6. Not protecting walls and bannisters
Even experienced teams can brush a corner or rail. Padding and coverings are simple insurance against ugly scratches.
7. Overestimating a team's strength
Two strong people can still struggle with a heavy item on a tight stairwell. Strength helps, but positioning and timing matter more than pride.
A small honest note: sometimes the item looks manageable right up until you bring it to the staircase. Then the whole mood changes. That is normal. It is also the point where you decide whether to continue or step back and use a better method.
Tools, Resources and Recommendations
You do not need a warehouse full of equipment, but a few practical tools can make team lifting much safer and easier.
- Furniture blankets or moving pads: useful for protecting walls, banisters, and the item itself.
- Grip gloves: help with control, especially on smooth or heavy furniture.
- Straps or lifting straps: can improve grip and reduce strain when used correctly.
- Corner protectors: handy for older properties where the paintwork is easy to mark.
- Floor protection: useful if the item needs to be pivoted on a landing.
- Measuring tape and torch: basic, but invaluable in dim hallways or awkward stairwells.
For larger household moves, it may be worth combining team lifting with a broader removals plan. Services such as house removals, man and van, or removal services can be useful when the staircase is only one part of a bigger job. If you are moving within a busy area or a converted property, planning matters just as much as lifting technique.
For local moves in older parts of London, it is also worth checking whether the access route is actually the issue rather than the item size alone. A service such as removals near me can help if you need support that is closer to your neighbourhood and familiar with tight residential streets and period homes.
Law, Compliance, Standards, or Best Practice
Moving furniture up stairs may seem informal, but there are still sensible best-practice expectations to follow, especially where safety is concerned. If a moving job involves employees or hired helpers, the working environment should be assessed properly and handled with care. In the UK, that usually means thinking about manual handling risks, trip hazards, load stability, and the condition of the route before anyone starts lifting.
There is no need to pretend this is glamorous. It is just good practice. And good practice saves a lot of grief.
For households and small businesses alike, the main points are straightforward:
- do not attempt a lift that feels unstable or beyond the team's capacity
- use proper route checks before moving heavy items
- keep access ways clear and well lit where possible
- use reasonable protection for walls, floors, and bannisters
- stop the lift if communication breaks down or balance is lost
If you are using a professional removals team, ask about insurance and safety procedures. A company that takes this seriously should be able to explain how it handles awkward staircases, fragile access points, and difficult items. That kind of clarity is reassuring. It also tells you they have done this before.
Best practice is not about being overly formal. It is about reducing avoidable risk. On narrow Victorian stairs, that is exactly what you want.
Options, Methods, or Comparison Table
Different items and staircases call for different approaches. Below is a simple comparison to help you think through the choice.
| Method | What it involves | When it works best | Watch out for |
|---|---|---|---|
| Two-person lift | One person at each end, moving in sync | Standard furniture on narrow but manageable stairs | Awkward corners and uneven weight distribution |
| Three-person lift | Two carry while one spots, guides, or supports rotation | Large or fragile items, tight turns, or poor visibility | Needs clear leadership or the extra person becomes part of the problem |
| Lift with straps | Using carrying straps or support aids to improve grip | Items with awkward handholds or longer carries | Only useful if everyone knows how to use them properly |
| Disassemble and reassemble | Breaking the item into smaller parts before the move | Wardrobes, beds, desks, some tables | Requires time, tools, and careful label management |
| Professional specialist move | Extra planning, equipment, and trained handling | Oversized, heavy, or high-value items | May cost more upfront, but can reduce risk and stress |
For many Victorian staircases, the smartest option is not the most heroic one. It is the one that fits the geometry of the building. Sometimes that means disassembly. Sometimes it means a three-person lift. Sometimes it means bringing in trained movers rather than trying to prove a point to a staircase. The staircase usually wins, by the way.
Case Study or Real-World Example
Imagine a two-bedroom flat in a converted Victorian terrace in South London. The staircase is steep, with a tight ninety-degree turn halfway up and a low ceiling near the landing. The item is a large wardrobe that arrives in one piece because the owner did not want to dismantle it.
At first glance, the wardrobe seems possible. There are two people available, the stairs are clear, and the route looks manageable from the hallway. But once they test the angle, it becomes obvious the top edge catches near the turn. Rather than forcing it, they pause, measure again, and decide to remove the doors and base trim to reduce bulk. They then use a leader at the top, a second person below, and a third person as a spotter for the landing turn.
The lift goes slowly. There is a brief pause on the landing. One person calls the rotation, another protects the wall with a folded blanket, and the wardrobe gets into place without a scuff. Nothing dramatic. Which is exactly how you want these jobs to go.
That little example shows the real value of team lifting techniques for narrow Victorian staircases: the method is adaptable. It is not one rigid formula. It is a sequence of sensible decisions that keeps the move under control.
Practical Checklist
Use this before attempting a team lift on a narrow staircase.
- Measure the item, stair width, landings, and doorway openings
- Check for low ceilings, sharp corners, and tight bannisters
- Clear the route of shoes, rugs, and loose items
- Agree one leader and simple commands
- Decide whether the item should be lifted, tilted, or dismantled
- Protect walls, corners, and bannisters if needed
- Wear suitable grip footwear and gloves if appropriate
- Test the balance point before lifting
- Use small, controlled movements on the stairs
- Pause on landings to reset the angle if needed
- Stop immediately if the item feels unstable or too large for the route
- Check for marks or damage once the move is finished
Expert summary: On narrow Victorian staircases, success usually comes from planning more than strength. Measure first, communicate clearly, and choose the least risky method for the item and the route. That simple approach prevents most avoidable damage and a fair bit of stress too.
If you are comparing moving options for a home, flat, or office, it can help to look at broader support too, such as man and van removals, furniture pick up, or packing and unpacking services. The right support depends on the item, access route, and how much time you want to spend wrestling with stair geometry.
Conclusion
Team lifting techniques for narrow Victorian staircases are really about one thing: making a difficult move feel controlled. Not easy, necessarily. Controlled. That difference matters. A narrow stairwell, an awkward landing, and a bulky piece of furniture can all be handled well if the route is measured, the team is coordinated, and nobody tries to rush the process.
The big takeaway is simple. If the staircase is tight, treat the lift as a shared task, not a test of strength. Plan the route, protect the property, speak clearly, and be willing to change approach if the item does not behave the way you hoped. Old houses can be charming, but they do like to keep you humble.
Get a free quote today and see how much you can save.
And if the move feels a bit daunting, that is fine. A careful plan turns a stressful lift into just another job done properly.
Frequently Asked Questions
What are team lifting techniques for narrow Victorian staircases?
They are coordinated moving methods used by two or more people to carry bulky or heavy items up or down tight, steep, or curved staircases safely. The aim is control, not speed.
Why are Victorian staircases so difficult for furniture?
Many Victorian staircases are steep, narrow, and turn sharply at a landing. That makes bulky items hard to angle, rotate, and balance, especially when walls and bannisters are close.
How many people do I need for a staircase move?
It depends on the item. Two people is enough for many household pieces, but larger, heavier, or more awkward items may need three people or professional help.
Should I dismantle furniture before trying to carry it upstairs?
If the item is large, tall, or awkward, dismantling often makes the move safer and easier. Wardrobes, bed frames, and some tables are common examples. If it can be reduced in size, that is often worth doing.
What is the safest way to move a sofa up a narrow staircase?
Measure first, clear the route, use a leader, and lift slowly with clear commands. Depending on the shape of the sofa, it may need to be tilted or rotated on the landing rather than carried flat.
Can I use lifting straps on Victorian stairs?
Yes, but only if the team knows how to use them properly. They can improve grip and reduce strain, but they do not replace planning or good communication.
How do I protect walls and bannisters during a move?
Use furniture blankets, padding, or corner protectors where contact is likely. Even careful teams can brush a wall on a tight turn, so a little protection goes a long way.
What should the team say during the lift?
Keep commands short and agreed in advance. Words like "lift," "pause," "turn," and "down" are much more useful than long instructions shouted in a stairwell.
Is it worth hiring movers for a narrow staircase?
If the staircase is especially tight, the item is valuable, or the route looks risky, professional movers can save time and reduce the chance of damage. It often comes down to how comfortable you feel about the lift.
What if the item gets stuck halfway up?
Stop immediately, stabilise the item, and do not force it. If needed, lower it carefully and reassess the angle, route, or whether dismantling is the better option.
Are there safety rules I should think about in the UK?
Yes. In general, manual handling should be approached with care, especially if people are lifting for work or on behalf of a business. The key point is to assess risk, avoid unsafe loads, and use proper planning.
How do I know if the item is too big for the staircase?
If you cannot turn it safely without strain, if it catches repeatedly on the wall or ceiling, or if you cannot maintain control of the load, it is probably too big in its current form and should be dismantled or professionally moved.
What is the most common mistake people make?
Rushing. The second most common mistake is assuming the staircase will be forgiving. It usually isn't. Slow, clear, planned movement wins almost every time.